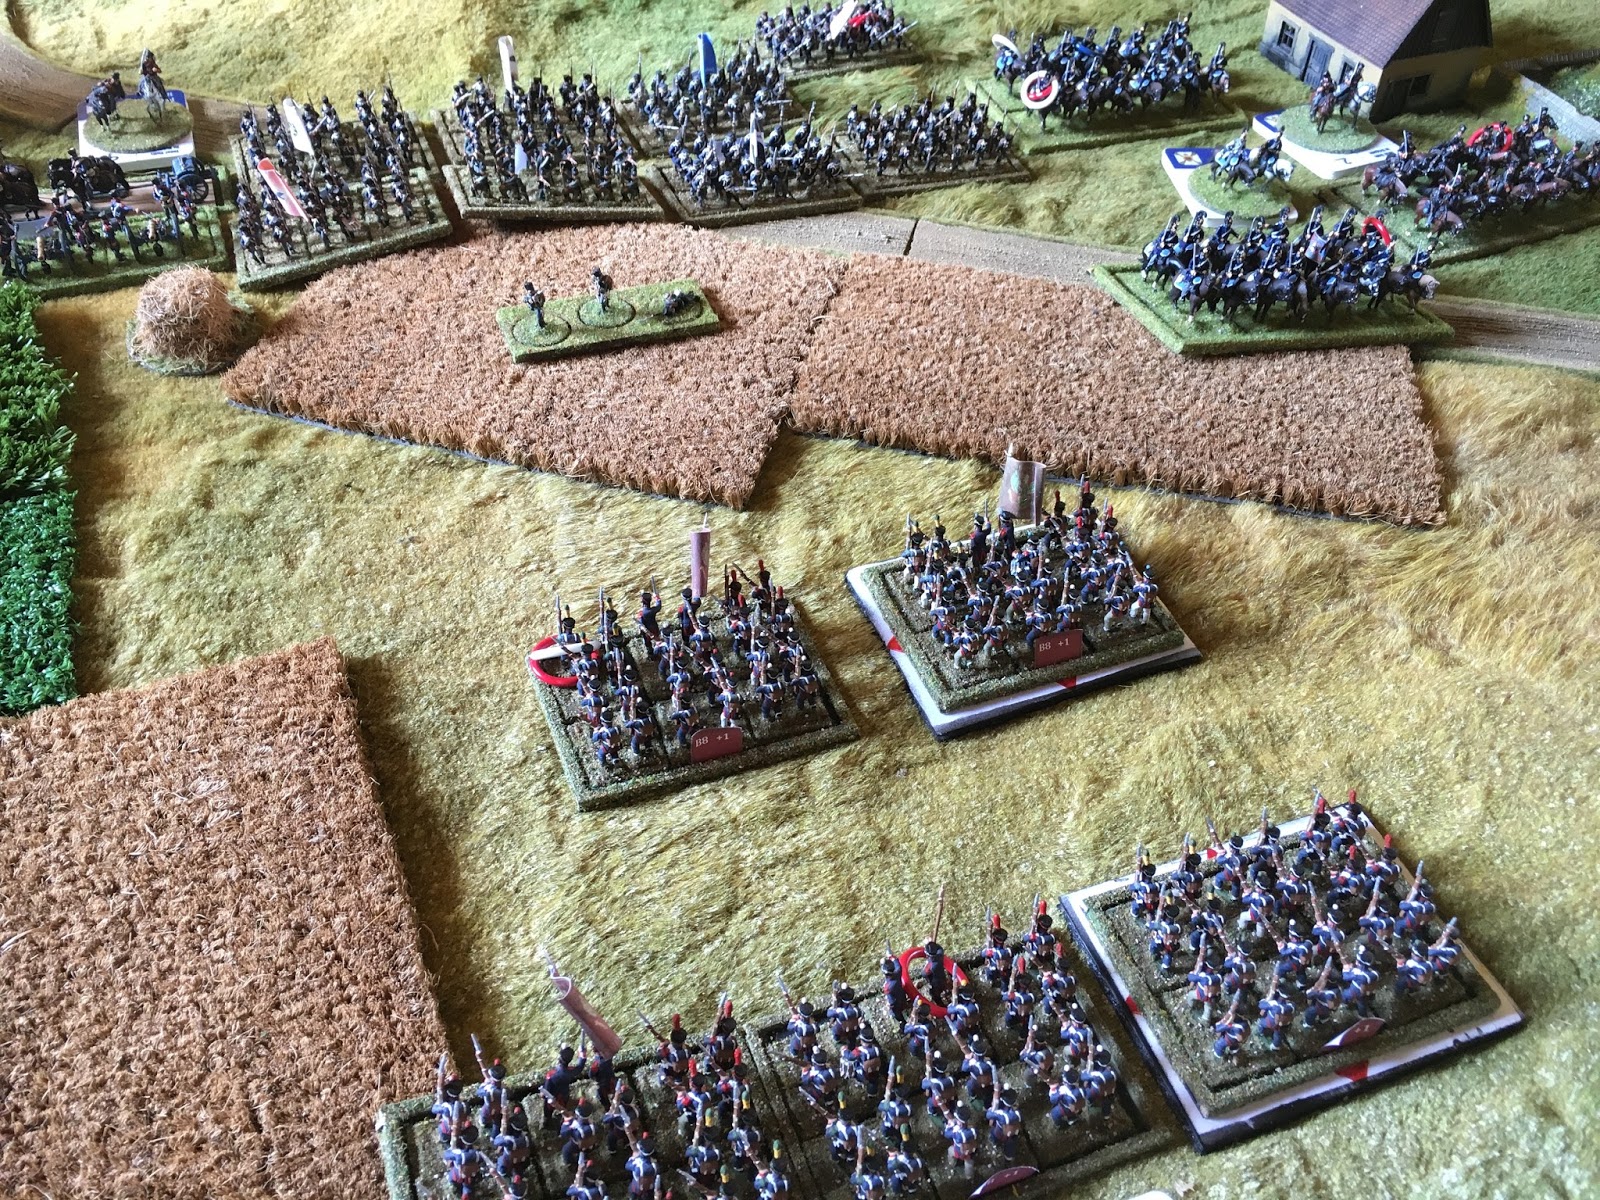
Tuesday, 4 July 2017

Napoleonic battle 1812/1813


Both sides, French plus Poles and Westphalians vs Prussians were fairly evenly matched with 3 Infantry divisions per side (2 brigades per division) and the terrain made up two nights before the battle commenced.

The positions were fixed and there were 3 objectives: the farm (3 buildings) , the village (seven buildings) and the bridge. 2 points for each objective. In the case of the buildings, the side that held the majority would get the points. Each hill (8 in total) was also worth 1 point and for every brigade destroyed, 1 point deducted. This latter inclusion was felt necessary as a draw seemed a distinct possibility before the game started. How wrong we were. The only variation in the scenario was that each side would have a flank attack coming on move 3 and with the 1D8 this would designate the point of entry. (8 being a deep flank attack)

OOB. 3 Inf Divs per side plus 7 cavalry brigades (independent) Each brigade of infantry and cavalry would have a brigade commander (BC), so a total of 13 each. Each BC would be given a rating ranging from +2 to -1. 2 BC's would be +2, 2 BC's would be +1, 2 BC's would be -1 and the remainder would be 0. Each brigade had a predetermined rating. (also from +2 to -1) Since the French had no Guard infantry or cavalry their solitary brigade with a +2 rating were the 2 regiments of Cuirassiers. The Prussians, however, had both their Guard infantry and Guard du Corps cavalry. The French would be relying on their Poles (+1) and had marginally better cavalry. The Prussians meanwhile had landwehr battalions (-1) scattered amongst each infantry brigade while the French had a Westphalian brigade, also at -1.

The French had stolen a march on the Prussians by taking the village (majority of) before the game had even begun. The Prussians were not aware of what faced them in the village though the blue and white flags might have given them a clue. Facing the Westphalians were the Prussian Guard's brigade and some heavy 12lb batteries. The French did not have any 12lbs as I still have not finished the caissons!!

Please refer to the map for the starting points:

PRUSSIANS: (line infantry were either Silesian, east or west Prussian or Pomerarnian)

C4    1 regt Sil Hussars + regt Drag + HA (routed)
B6    4 bbs line + 2 bns landwehr
B5    3 bns line + 2 bns landwehr + 1 bn of jaegers + FT (6 lb)

C5    1 regt Sil landwehr + 1 regt Uhlans
C1    2 regts of Guard du Corps + HA (Guard) (in fall back, badly mauled)

B4    4 bns line + 1 bn landwehr + 1 bn jaegers + FT (6lb)
B1    6 bns Guard + 2 FT batt (both 12lbs)

C2    2 regts Cuirassiers.
C3    1 regt Hussars + 1 regt Drag

B2    4 bns line + 2 landwehr + 1 reserve + 1 jaeger + FT (6lb)
B3    3 bns line + 3 bns reserve + 1 landwehr + 1 jaeger

C6    1 regt Hussars + 1 regt national cav + HA
C7    (flank attack) 1 regt of Uhlans, 1 regt of landwehr cav
Map 1. Starting positions.
Flank attacks on map 2.

FRENCH

C6    2 regts Drag + HA
B6    6 bns Polish line + FT (6lb)
B8    6 bns Polish line

C7    2 regts Hussars (routed)
C9    2 regts Drag

B7    5 bns French line + 1 light bn + FT (6 lb) (fall back)
B12   6 bns Westphalian line + FT (6 lb)

C3    2 regts Cuirassiers + HA (routed)
C8    1 regt Hussars + 1 regt line lancers (routed)

B5    3 bns French line + 2 bns Swiss + 1 light bn + FT (6 lb) (routed)
B4    5 bns French line + 1 light bn + FT (6 lb) (routed)

C5    2 regts Drag + HA (routed)
C4    (flank attack) 1 regt lancers + 1 regt hussars. (routed)


C6. Prussian cavalry on their right flank. This brigade was all but destroyed,
 especially when the French flank attack appeared directly at their location. 

B3 in the foreground with B2 in the distance.
Larger brigades

C3 and C2

Part of the Prussian Guard's brigade opposite the village.
 Two 12lbs, one already deployed.

B4. This brigade would help the Prussian Guard
in their assault on the village.

C1 and C5, with B5 in the distance.

C4 and B6. Prussian left flank. The two brigades of this
Division were divided by the stream.(fordable) I think it was this
 Brigade that saw at least 3 different commanders.

B4 and C5. French right flank.

B5 This brigade shows that different makes can blend
 and why not plastic??!! Swiss (French airfix) French line: Scruby? Newline design
 and Zvevda French light infantry (plastic)

C3 and C8. The destruction of these units partially led
to the collapse of the French right and centre right.

B12. Westphalians in the village.

B7. Supporting the Westphalians. This brigade took some of the
 pressure off the Westphalians by at a cost.

C9. French Dragoons.

C7. This cavalry brigade was eventually destroyed.
B8 The Polish brigade

B6. Polish brigade and C6 French Dragoons.
French left flank would have to beware of the Prussian flank attack

 Prussian iniative:

The Prussians won the initiative and elected to go first. The big advantage in this instance was that units beyond 80cm of the enemy could move twice. This allowed the Prussians to get close to the barn in the farm complex and for their Guard to close in on the village and deploy their artillery.


B5. This brigade was ordered to cross the stream and aid their colleagues on the flank.
This move proved crucial in winning this flank and ultimately securing the bridge.
The light battalion approached the bridge via the wood.

C4 and B6. Prussian infantry and cavalry attempt to secure the ridge line.


B5. French infantry and those Swiss head towards the bridge.

C3 and C8. French cavalry to the right of the village.


B7. French infantry move up to help the Westphalians in the village.


B6 and C6 move up to secure the hill overlooking the farm.

C7 Prussian flank attack arrives at entry point 2, so too shallow
 and had to catch up their colleagues (C6)


Prussian Guard close in on the village. Their artillery got one round of effective fire in,
causing casualties, before their own infantry made further firing impossible.

B4. Having taken this building in the village, the Prussian jaegers were caught out by French Cuirassiers and destroyed. However, the cuirassiers could not unentangle themselves from the successful melee, and in turn would be annihilated. 


Prussian B5 coming the aid of B6
which was on the verge of routing.


The Swiss are nearly at the bridge, while
 French infantry start to scale the ridge

Swiss battalion about the secure the bridge.
The Prussian light battalion, in the wood, meets its counterpart.

French Cuirassiers rout the Prussian jaegers but
 were soon counter attacked shortly afterwards.

B4. prussian infantry start to (slowly) gobble up the village

B8. This Polish brigade stopped in the face of the Prussian B2 with artillery.

Prussian cavalry make their numbers count on their right wing.
 (C7 and C6)

B6. The Polish made two attempts to capture the barn and failed both times.
Disorder mounted up on both units making any subsequent attempt all the harder. 

B8. Once this brigade did move forward, the two right hand battalions became pinned down by Prussian cavalry, notably the East Prussian Cuirassiers. (C2)

French begin to withdraw from the village


By the end, a few prussian units held the ridge and the bridge., but both French
 brigades fell apart with only 2 out 6 battalions leaving the field in order. 

C1. The Prussian Guard du Corps effectively ceased
 to exist by the end but they had done their job.

Prussian artillery left in the rear.

The Allies never got another chance to take the initiative.
They would have loved the opportunity to have two consecutive
 moves at approx move 3 or 4, but never got the chance.
When they did, move 6, it was too late. Game over by move 7 (is that a record?)

This illustrates what a hard fought game it was. The Prussians took severe casualties but only lost 1 cavalry brigade.

Map 2. Shows the flank attacks and movement of units.
 A x with a unit indicates which were routed.

We did in fact tot up the points in the end. Prussians ended on +9 and the French -5. But at lunchtime the battle was in the balance. All the more remarkable as to how it finished up.

Excellent fun and the rules stood up well. The brigade test, taken before each move, for every brigade, does take time, but is crucial to the command and control mechanics of the game.

The French right hand brigades eventually ran out of steam, despite having a superior cavalry presence by the end. This was not enough to secure the ridge or the bridge, which ultimately became untenable when Prussian cavalry arrived late in the day.  So the Airfix Swiss, who marched joyfully across the bridge earlier, found themselves leaving the field in a hurry shortly afterwards.

The Westphalians in the centre did as well as could be expected, but successive  throws of 1 or 2 in this game will always make life difficult. The Poles tried but ultimately failed to take the barn in the middle of the farm complex. So each of their +1 battalions never saw their potential fully realised.

Credit should be given to the Prussian commanders. The Prussian right used their cavalry to put pressure on the Poles without committing their inferior infantry. The Prussian Guard made their +2 rating count in the village, but even they were badly mauled by the end. The Prussian left took the decision to cross the stream and reconsolidate their divided B6 and B5 brigades. This action saved that flank.

All over in 5 hours of playing time. Thanks to all those that attended.

PS I will eventually get time to paint the newly arrived Art Miniaturen French cavalry line chasseurs as the 3rd, 5th, 16th and 22nd regiments, and have them ready for 2018.

Tuesday, 6 June 2017

Hanau 1813 re-fought

                                        Please refer to the Hanau map in a previous post.

17 X 9 foot tables with the usual teddy bear fur.
Hanau
The Allies were uncertain if any French would appear to the right of the Kinzig stream (now river) and at what point it might be fordable. They were convinced that given the space on the table, something would arrive…surely?

The French meanwhile would have their own problems of hacking their way through the forest, clearing it of Bavarian skirmishers and deploying their artillery. Admittedly this took 3 of the 10 moves completed so perhaps we could have started the game without this skirmish encounter. Also unknown was the whereabouts of the Russian Cossacks but the French rightly sniffed the saddle sores in the woods to the French right wing, where their own cavalry would come cascading down, and delegated French hussars to screen this threat.

Hanau in the distance with woods in the foreground,
which would conceal the Russian Cossacks.
Austrian medium and heavy cavalry
with their Bavarian allies in the distance.
 The French would shortly appear from the woods at the top.
Bavarian infantry and supporting artillery.
 A tad too close to the woods?
Sadly the Bavarian artillery/limbers and caissons were not ready in time for this battle so I had to provide more Austrian ones. The French limbers and caissons are also work in progress. We fielded 6 brigades on each side and fairly large quantities of cavalry (probably should have been less), the Allies out numbering the French cavalry by one brigade. The Austrian problem was that one brigade of infantry was on the wrong side of the Kinzig with two brigades of cavalry, convinced that something nasty would appear to their front. There were two Austrian Grenadier brigades in Hanau itself with artillery and they were not permitted to move until move 3.
1st and 2nd Austrian Grenadier brigades complete
 with two 12lbs and caissons. None of this force was to see any action.


Austrian right wing, ready to face the French?
The Austrian centre opposite  Neuhof
with supporting artillery dug in.
Same brigade as above but with the Lamboy bridge visible.
French infantry and detached artillery forcing their way through the forest.
French cavalry on the their right wing, led by hussars, then dragoons,
 followed by Guard and then heavy cavalry. A conveyor belt of horsemen. 
French heavies in the foreground.
Once most of the Bavarian skirmishers had been cleared, the Old Guard emerged from the tree line to face two brigades of Bavarians with supporting foot artillery. Initially the Old Guard had difficulty in making their quality count but soon the left hand Bavarian brigade was under severe pressure.

Austrian right advance.
Meanwhile the French left was left to a cavalry brigade of lancers and hussars, with one infantry brigade, and one foot battery to try and hold the Lamboy bridge. Efforts were made by both sides to take the village of Neuhof, with the Austrians being the eventual winners. The Austrian right wing by move 5 realised that nothing was going to appear to their front and so swung round and found the Kinzig fordable north of the Lamboy bridge.
Hanau detached!!
The French cavalry on the French right swept down and were initially met by a Bavarian brigade of Cheveuxleger (Hagen) and Bavarian lancers (plastic / Zvezda) who decided to withdraw and allow the better quality Austrian dragoons to have a bash who had come up from a deeper position. The French cavalry did not have the width of deployment to make their numbers really count. The French Guard cavalry and heavy cavalry brought up the rear.

French hussars and lancers attempt to hold the Lamboy
 bridge with artillery support and infantry.
French log jam in the woods.
Hard going.

French heavy cavalry

Allied guns fire at the French cavalry advance.
Austrian left wing. Bavarian cheveuxleger and lancers are in front. Austrian hussars,
 and Uhlans hold the middle while Austrian dragoons and
 light cavalry come up in support to meet the French.
Massed French cavalry.
French difficulty of deploying their artillery.
The 1st Bavarian brigade in danger of collapse with guns limbered and falling back.
 Austrian heavy cavalry move into the gap to face the Old Guard.
Bavarians facing the rear. This 1st Bavarian
 brigade was subsequently routed.
French progress against the 2nd Bavarian brigade was more muted.
Bavarian light cavalry looking a bit battered.
The French hussars on the French decided to enter the wood and became disordered as they did so, and sure enough spotted the cossacks hidden inside. Not one, not two, but three cossacks regiments with horse artillery ready to pounce. The Cossacks were then forced to attack and faired well, routing one French hussar regiment in the process. Where were those Krakus Cossacks when you need them?


Russian cossacks in the woods make their presence known.

Polish lancers attempt to deal with the Cossacks.
As do the French hussars.
The Bavarian centre was in danger of collapsing as the 1st Bavarian (left) brigade was routed and removed, but the 2nd brigade held on to form a defensive line. The rear Austrian Grenadiers moved out of Hanau to form a second deeper defensive line should all else fail. The Austrian Cuirassiers were thrown at the French Guard, using the initiative double move, and caught several Old Guard battalions not in square, who were swiftly put to the sword. But Austrian cavalry reserves were drying up while the French still had fresh Guard and heavy cavalry to commit.


Austrians take and cross the Lamboy bridge.

Austrian cavalry find the upper Kinzig fordable.


Austrian artillery on the solitary hill found it
difficult to locate a target.
The 2nd Bavarian brigade attempt to hold a line,
with support coming to their right.

Austrian infantry crossing the Lamboy bridge.

Austrian cavalry making significant progress
past the rear of the village of Neuhof.

French cavalry withdrawing on the French left wing.

Progress on the French right, stand off in the centre,
while the French left looks in danger of total collapse.
In the end the Allies did better than expected and a second day of gaming might have produced a conclusive result. The Austrians did manage to cross the Kinzig and the French left looked particularly weak as their infantry and artillery covering the Lamboy bridge were destroyed. Their cavalry retreating in the face of overwhelming numbers. The Allied centre right held, the Austian grenadiers never having been committed, so it was likely that any further French advance was going to be tough. The French were never really able to deploy their artillery properly, as there was little space….even on a 17 foot wide table. Had the French left ignored the Austrians on the far side of the Kinzig and attacked the 2nd Bavarian brigade to their front, it might have been interesting to have seen what would happen. Perhaps the three wasted moves clearing the woods of the Bavarian light infantry might have given the french more time to concentrate their efforts on the Bavarian 1st and 2nd brigades. Perhaps a Divisional test for the Bavarian 2nd brigade. (which we didn't do) The sensible approach, for the French, was to defend their left and rely on the French Old Guard and cavalry, which is what they did.


Good fun by all. Some new and newish commanders got to grips with the rules remarkably quickly which made the job of umpire considerably easier. Thanks to all who came and the next game will be on the 2nd July.


Friday, 12 May 2017

Napoleonic skirmishers

Some do and some don't. The intrinsic problem with representing skirmishers on the table top is threefold: it clutters the table and can slow the game down to such an extent that turns begin to take too long, and can simply over complicate the game. A recent Peninsula game, re-fighting Vitoria 1813, saw Allied skirmishers sweeping all before them so a happy medium has to be made. Worth having them on the table? I think yes, but let's not get too pre-occupied with their role that we end up with a messy table and a slow and complicated game. My collection focuses on central Europe in 1812-15 so avoiding the complication of how to use skirmishers properly in the Peninsula campaign. In Spain it is more difficult and greater thought may be needed as to how to represent them effectively.

Back to central Europe….
For infantry I have adopted the 3 man independent skirmish base for each formed light infantry battalion, which must remain a certain distance from their parent unit. Using a D8, this stand will score a disorder on a throw of 7 or 8 against most targets within range and if the target is already disordered, a hit. They are removed on contact with cavalry and retire on contact with formed infantry. They do not melee with anyone. If the parent unit they belong to is removed, the skirmish stand is removed also. I fully appreciate that whole battalions and whole brigades might deploy into skirmish order but that would be missing the point. If we try to cater for every eventuality in creating a rule set, we end up with an unworkable collection of rules.(or a very messy table!)

Saxon skirmishers in the distance, taking a pop at some
 Prussian Cuirassiers. advancing across their front.
But what about cavalry skirmishers? Not sure if I have ever seen this represented on any table but if the campaign stage of a game is missing, it would be fun to have this element introduced. Again in a limited way. The role of the umpire might become necessary to make this work. For example, if there are hidden forces in a wood or behind a hill, you would not send a whole regiment of cavalry to recce the area, but perhaps just a token force. This could be represented by 2 figures on a base, who can move further than other cavalry units, but have no offensive role. Would retire on contact with any formed unit and would stand off against any enemy cavalry skirmish stand, so would be almost impossible to wipe out. I appreciate they had their carbine, but enabling this token force to score disorders or hits, would make them too important. Their role would be to scout areas of the battlefield for hidden enemy units only. Perhaps just 2 bases per side.

Art Miniaturen have introduced some excellent Prussian cavalry jagers and Hagen Miniatures some superb Bavarian cavalry skirmishers:


I think this could work so I will think about introducing this element to the game over the coming months. After all, no general knew what he was up against so having some "unknown" element to any game should always be included if at all possible. This addition will enable a general to sniff out those unknowns.

Friday, 28 April 2017

Napoleonic Bavarian artillery

Franznap has spotted a niche. By producing artillery riders with greatcoats/overcoats they have given war gamers the flexibility to produce some interesting conversions, even if the covered up uniform might be a bit dull. It also helps to alleviate the problem of getting these uniforms right…quite a bit of conflicting information.

The heads were from Bavarian infantry (SHQ) and not from Newline Designs as they would have been too small.  I was keen not to cut off the collar of the Franznap French artillery rider bodies. Look ok to me. The horses are from Art Miniaturen (static Prussian) and the French caisson from Franznap. Looks like I will need to order the Art Miniaturen Prussian caisson to accompany this Bavarian set. I may also have to trim down the boots as they probably ought to be wearing campaign trousers. (the boots are barely noticeable under the coat) I also had to trim off the bum roll from the horse or else the rider would not fit properly onto the horse.

I have no idea at this stage which limber to choose but reading various forums it would probably be either the Austrian or Prussian limber (probably the latter) Bearing in mind so much equipment was captured I think the colour of the limber and caisson is perhaps more important than the actual type.

The Prussian caissons are also nearly finished. Just need to do the traces and base them properly. One row of these horses have not yet been stuck down….or else I would have problems doing the inside track of the traces. Tedious job but needs must. I will add some hay to the rear of some of the caissons.