Friday 13 December 2019

New French and Saxon hussars by Art Miniaturen

Excellent news...due out in Jan 2020. 1/72. Perhaps these could be used as Bavarian, Polish, and French Honour Guard as well?

French hussars. The static position looks so much better.

French hussar

Saxon hussars. Will be interesting to see what the differences are
 between these  and the standard French hussars. Shako pompom?
He has used some poses from his Prussian and Russian hussar range. 

Tuesday 10 December 2019

Wurttemberg line infantry. 1813

These chaps arrived from Australia and the detail/piping is excellent. Newline Designs figures.

6 bns. Pink, yellow and blue facings. Likely to add another 6 bns in white, green and red facings to complete the division. Foot battery to come courtesy of Franznap. Command also to come from Franznap. Flags from Maverick models.

4 bns will appear at Dennewitz next year.


Monday 2 December 2019

Are movement trays for 20mm Napoleonics necessary?

It all depends on how much time you waste moving troops around and how large the battle is? Add to this, if you own and have painted the troops yourself and fear you or your clumsy friends you are playing with might damage them, then the adoption of movement trays becomes more convincing.

It is clear that if you want a fast wargame as most games have time constraints (dining table needed for dinner etc), and you enjoy large battles with lots of troops, and you treasure your figures, then having movement trays becomes a no brainer.

The next question is whether to buy ready made or make them yourself. The former option can be expensive so here is a suggested cheaper way, without requiring major work.

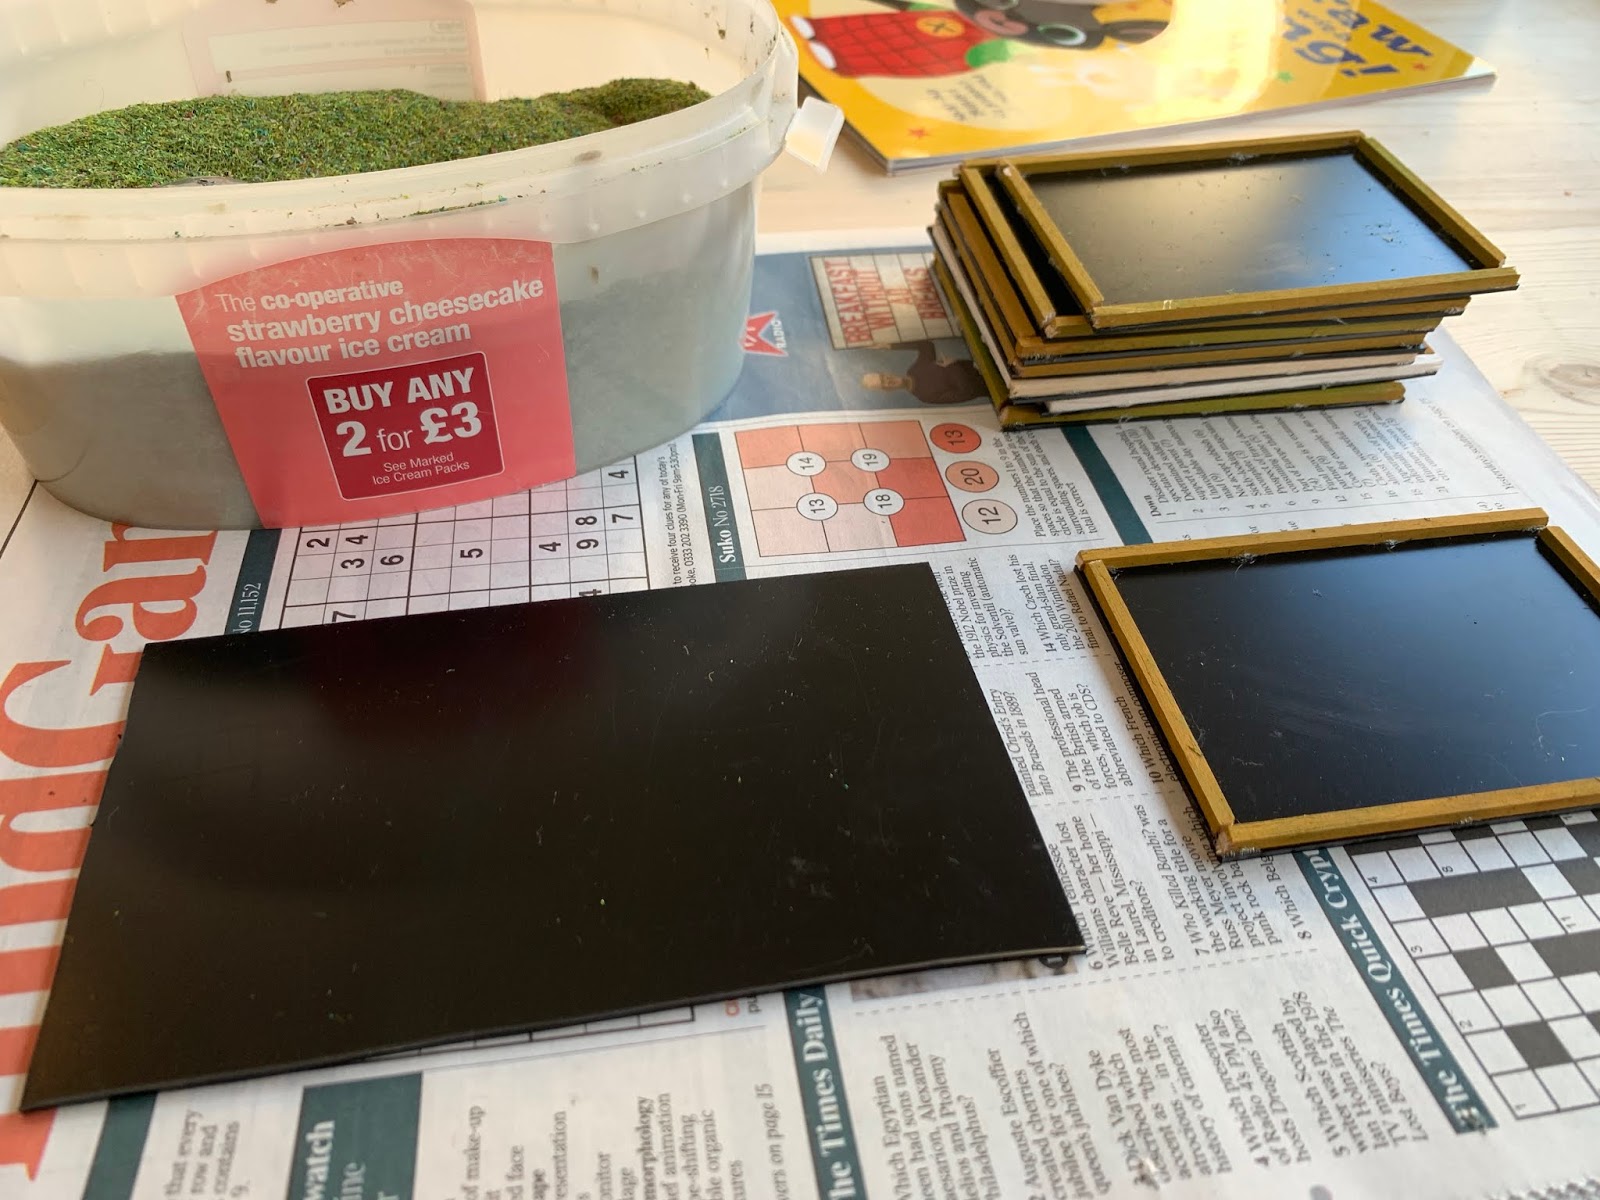
Flock in a large tub, infantry trays cut to suit the size of a unit.
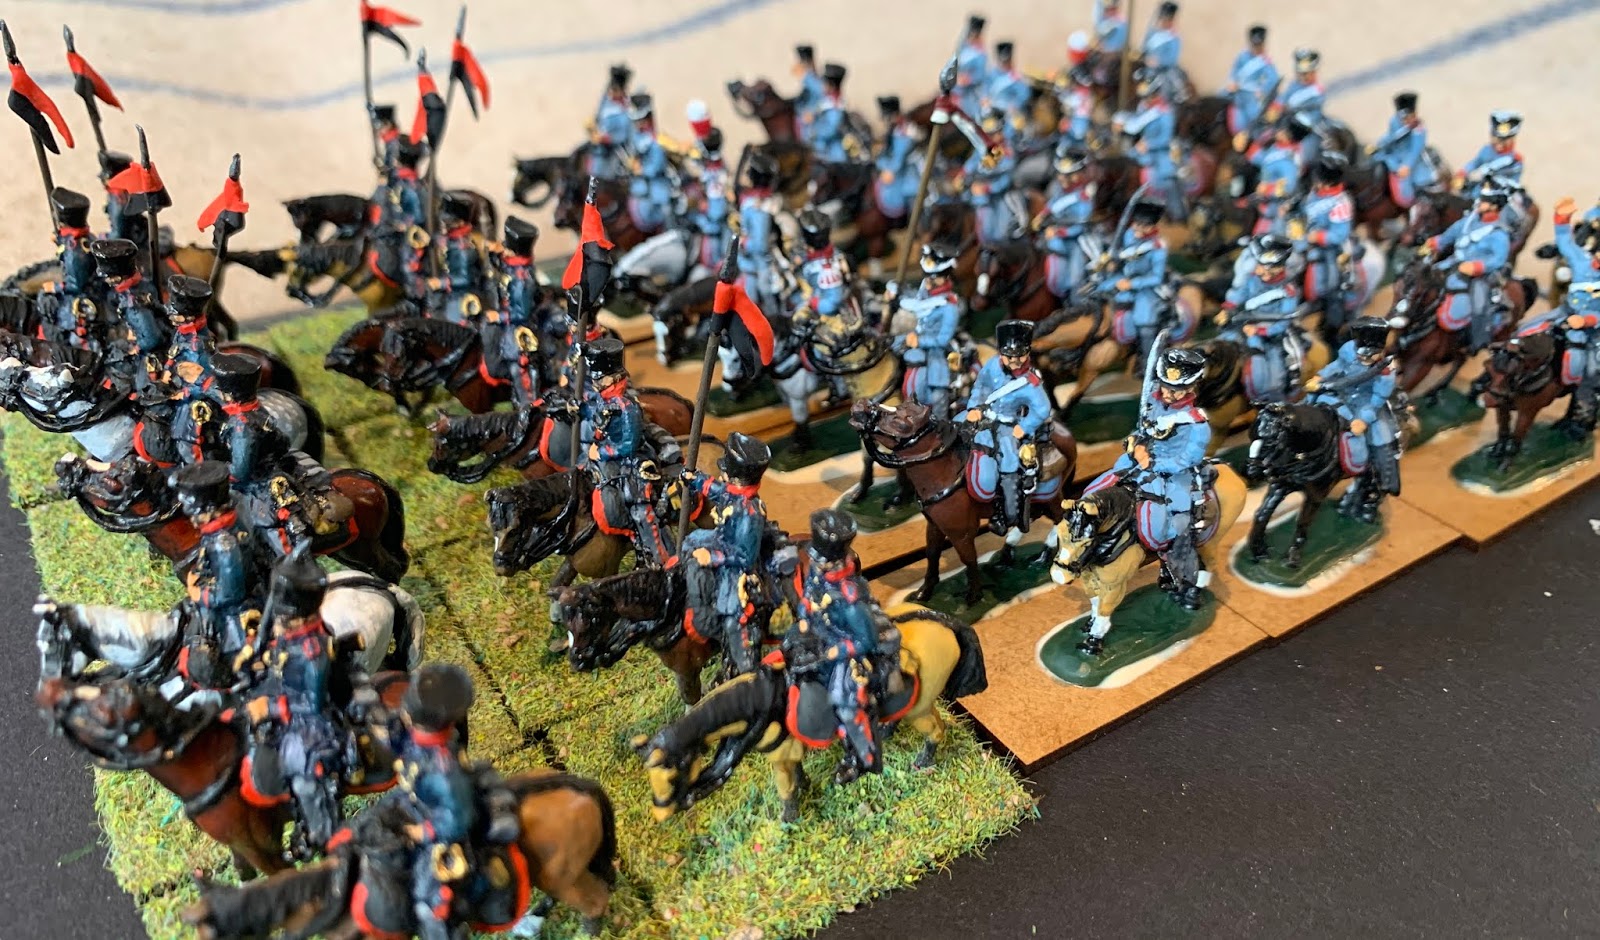
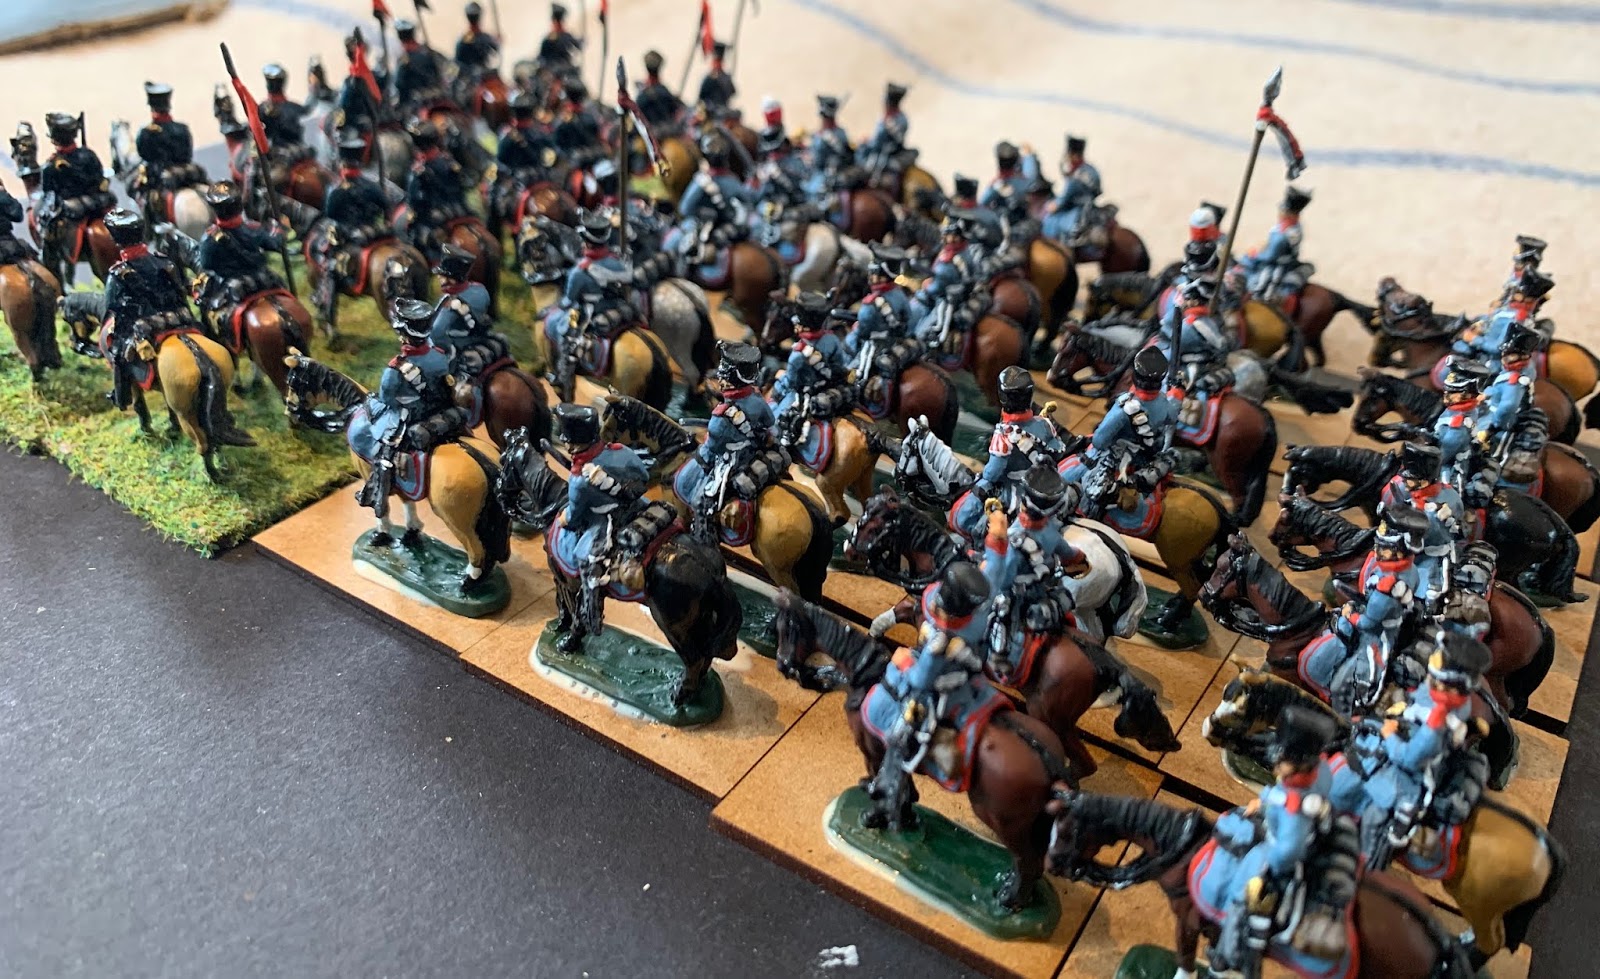
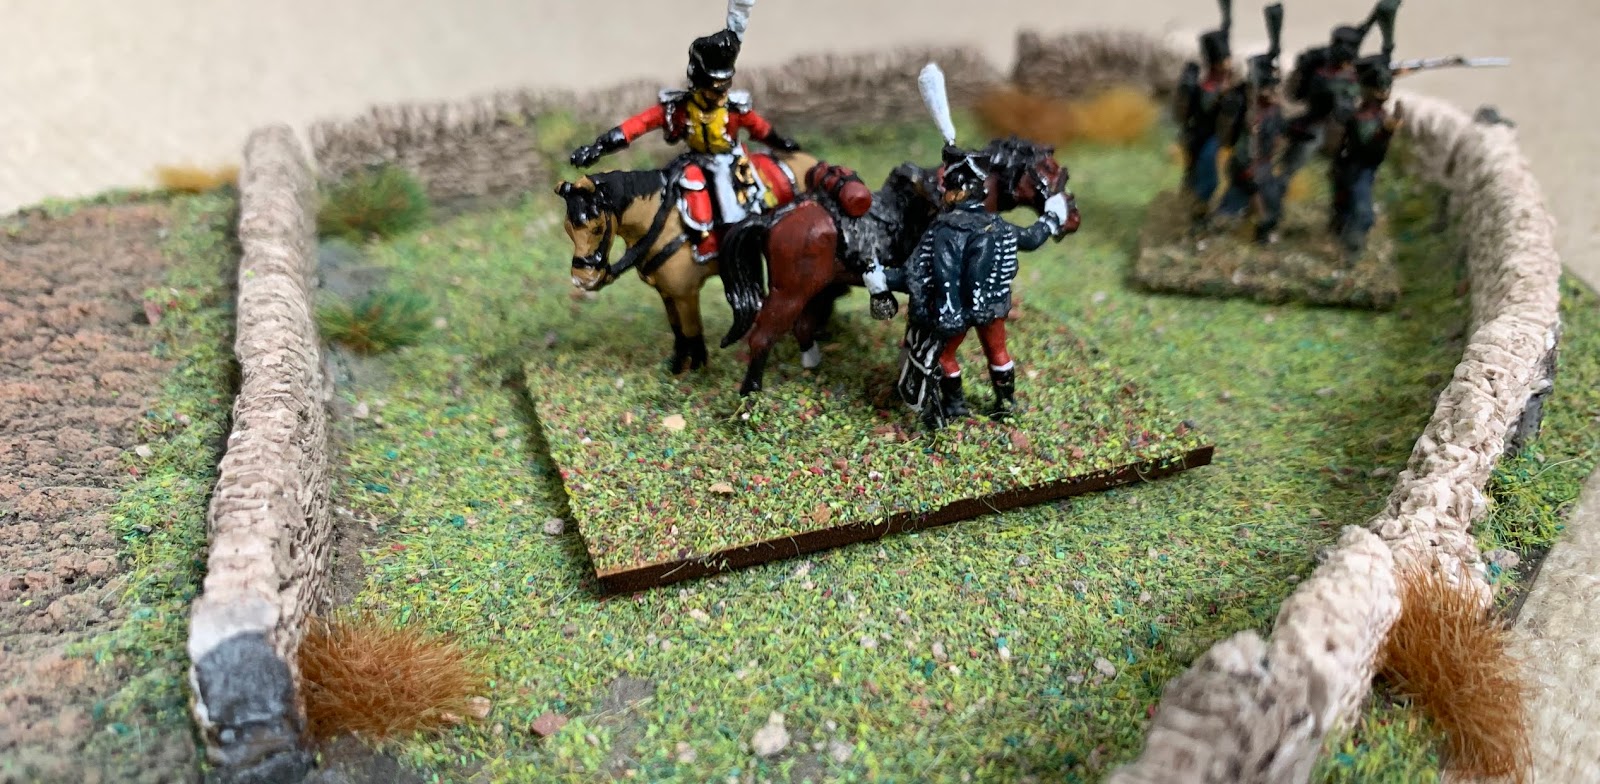
Cavalry (left, 16 figs)) and infantry (right, 24 figs)

A4 size plasticard in dark brown (2mm thick) with balsa wood to stop the figures falling off. Balsa wood, for its weight is one of the strongest woods you can buy. Once glued to the plasticard it becomes strong but light.
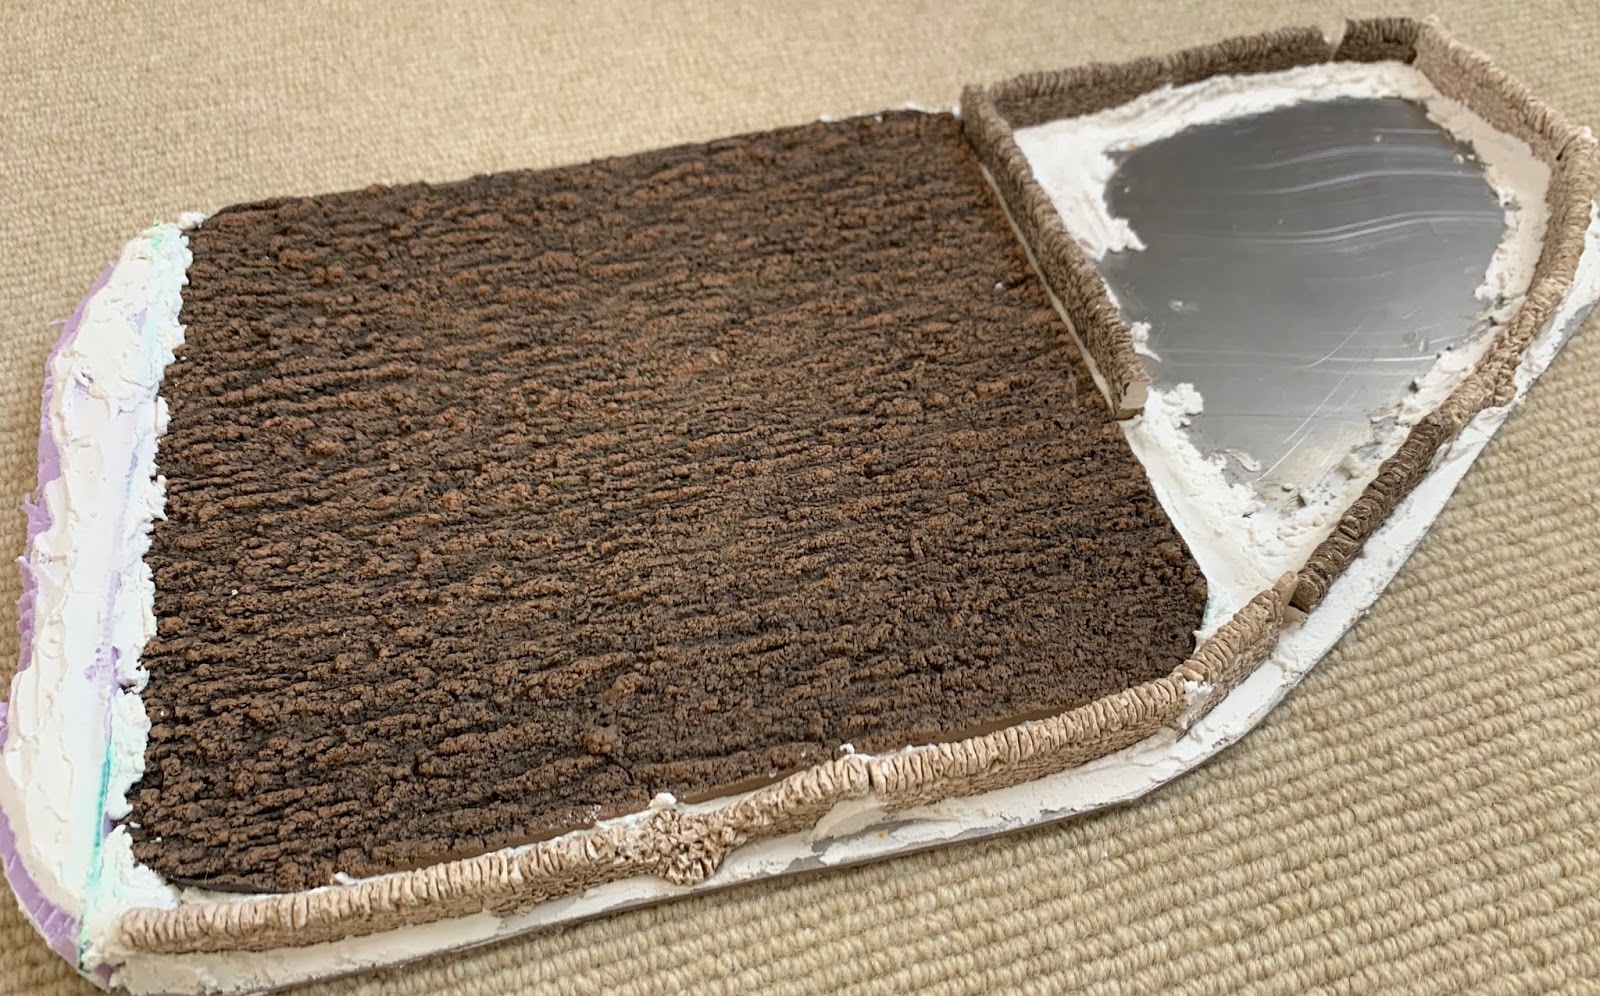
Cavalry tray with balsa wood. The balsa wood has had a coat of standard
 green/brown emulsion paint added so the white of the wood is eradicated.
 This could be a lot darker than shown here.
cut balsa wood lengths first, then the side panels to fit inside.
 UHU dabbed on. Allow to dry. (30 mins)

Balsa wood cut to size and glued with UHU.
Copydex glue added and brushed on.
Then place the whole tray into the flock. Easiest method.
Allow to dry. (30 mins)


Notice there are still small gaps but these ensure you
do not waste plasticard if cut too small.
Yes...the cavalry standards are a little big, but I like to see them!


A 24 man infantry battalion had a card cut to size of 4.3" x 3". So an A4 sized plasticard will give you 8 movement trays.Allow a 2-3mm gap across and deep so when cutting the plasticard with a Stanley knife, you ensure the figures will fit. The flock will also cut down the space available.
Both the balsa wood and plasticard available from Steve at Arcane Scenery. (UK)

Friday 22 November 2019

Best Art Miniaturen pose?

The latest Art Miniaturen Dragoon figures contain one particular pose that says everything about Art Miniaturen. Someone who understands what a natural pose, in this instance of a trooper sitting on a horse, should look like. Sculpting the rider with the saddle has clear benefits in this respect. It can be frustrating trying to squeeze a rider onto a horse where there is a gap beneath the poor chap's bum that just won't close. Art M continue to lead the pack when it comes to 20mm/1/72 scale while the same could be said for AB at the 15mm/18mm scale.


These two regiments, the 1st Konigin/Queens and 3rd Lithuanian, can only really be told apart by the different standard (have arrived from Maverick Models and on the to do list) and the marginal difference in facing colours and buttons. For facing colours, Vallejo scarlet for the Lithuanians while for the 1st regiment, Vallejo carmine was used. Vallejo azure blue mixed with a little black for the coats, and plain azure blue for the highlights. Pure white for the webbing.

The 2nd Neumark Landwehr from before, at the front. (no standard)


Tuesday 19 November 2019

Dennewitz 1813 map. Prussian dragoons.

The table layout will have two 12' x 6'5" tables plus an additional table of 9' x 5' to cover Rohrbeck and Juteborg in an L shape. Entry points from A-L also placed. There will be seven villages, woods and four "hills" even though it seems the countryside was rolling and the only hill that seems to get a meaningful mention is the one to the NE of Nieder-Gorsdorf. The rules do not allow for a road bonus so the only roads that will feature will be those illustrating the direction of march of Ney's army.  The immediate area around Dennewitz is likely to be congested with both troops and players but that is difficult to avoid. There will be just over 3,000 20mm Napoleonic troops, some of which are still being painted both in the UK, and in Australia by Dan Dunbar.

Most of the research has come from Thierry Louchet's article written in French in 2014. The detailed maps and OOB are more easily understood than the language barrier.

Game to be held in the barn in June 2020.

Dennewitz 1813 map and table layout.

Prussian dragoons. 1st and 3rd regiments.
(Konigin/Queens and the Lithuanian dragoons)

Wednesday 6 November 2019

2nd Neumark Landwehr Cavalry.

Initially the pennants were going to be white over black but it seems the standardisation from using the facing colour really only happened well after 1813 so for 1813 itself I have reverted back to red over black. Slightly brighter red than normal to ensure the colour stands out. Enjoyed painting these Art M figures which will feature at Dennewitz next year. Tempted to get another couple of batches to paint as Pomeranian Landwehr cavalry and Kurmark Landwehr cavalry.

Prussian Königin (crimson facings) and Lithuanian Dragoons (red facings) to come next. (These will be added to the existing Brandenburg and Pomeranian Dragoons.)

nearly finished with white over black. 

More or less finished but now with red over black.

Underway....
French half naked and naked engineers to be added to the
pontoon diorama which featured in an earlier post.

Thursday 17 October 2019

Saxons 1813

Eight battalions of line, plus two jaeger battalions. The plan is to add two grenadier battalions, but I'm not clear which "guard" figures to use. Strictly speaking they ought to be in shakos with plumes...?

Saxon foot and horse batteries are in another box.
All figures are Art M except for the jaegers (Zvezda)


Napoleonic building phase III

Eventually it gets to the point that one has to draw a line when painting/tarting up a model. This is phase III. There are imperfections, especially when you compare it to other more professional model makers and painters, but once it is placed on the table for Dennewitz next year, all those doubts should disappear.

Nearest building now glued into place.

Climbing creeper. Just need to paint over the glue marks. 


Then added some logs, a clock, some flock and the odd flower. 


Tuesday 15 October 2019

Painting a Napoleonic building. 1/72. Phase II

Admittedly this is taking time....

Varied roof colour....reddish brown/grey on the tower and one building while the solitary building is more of a grey slate. I expect this may not get finished for another few weeks yet.


Wednesday 25 September 2019

Painting a Napoleonic building in 1/72

Jim recently did another of his beautifully crafted "German buildings" suitable for a Napoleonic wargame though I decided to paint this myself, though there is no doubt his standard of painting far outstrips mine.

I have taken his suggestions on board. The model arrived pre-painted in a dark brown. One of the buildings can be removed for ease of access.

Jim suggested I dry brush the woodwork with several layers finishing with a lighter brown. Then I moved on to the "pinkish" building. Two hours later one evening, this is as far as I have got!


Tuesday 24 September 2019

Wurzburg battalion

Finished a Wurzburg battalion to represent the two battalions that fought at Dennewitz in 1813. 
The uniforms are very close to a standard Italian battalion, but this battalion will be brigaded with French troops under the command of Durette. (32nd Div) (Reynier being the Corps commander) The other two Divisions being Saxon. 

The mounted colonel is from Art Miniaturen as are the grenadiers and voltigeurs. The line companies have been drawn from figures produced by Hagen. Sizewise they are a perfect match. I decided to paint the gaiters in white rather than black below the knee, just to make a change. The flag is from the freebie site warflag.com 

The Wurttembergers are presently in Australia waiting to be painted by Dan Dunbar.


Würzburg battalion ready for Dennewitz. 


Monday 19 August 2019

How important is terrain?

We spend time painting our figures and time working on a playable rule set but the third ingredient to a successful war-game is the terrain. After all, surely the whole spectacle should look good....yes?

A bright green cloth with out of scale buildings and trees, are all too common. Time working on the terrain must be worthwhile.

First attempt....and bar a few errors.....not too dispirited.

Ploughed field and wall example.

Steel base. Heavy (downside) but won't warp (upside)
 Ploughed field from Noch railway accessories.
Dry stone wall bought on Ebay. Pollyfiller (white)
The bank on the extreme left was cut polystyrene., partially covered in pollyfiller. 
Painted over in a dark brown. The ploughed field needed little in the way of additions.
Saxon jagers. Wall still needs to be toned down so the
starkness looks more like the left hand side.
Add glue (copydex) and flock. (pre mixed)
Might place a gate in the gap in the wall.

The odd tuft....wall still to do.

Saxon command (Art Miniaturen)


 French engineers working on a pontoon example. I sourced two pre cut mdf bases.

Standard MDF from Ebay. 
Is pollyfiller the right answer?
No idea....but seems to work well. 
One side has a larger bank of earth. 

Gabions added. These were plastic and bought on Ebay.
Had I not painted these ages ago, I would
 have spray painted the whole lot in dark brown. 
Different browns with a little green.
A feeling of water....mud.
Flock and figures to add.
Mdf base with a river section (Ebay) glued on top. and then cut to fit.
Pollyfiller added for texture. 
Painted green and brown. Dark blue/green for the river.


Stage arranging, vital to avoid errors and changes of heart, before finishing touches.
Figures are all Franznap. These are excellent castings.


Some villajo "mud" added, with the figures glued on and then flocked.
Match sticks added for posts next to the pontoon. I might add some rope to link these.
Two figures are loose. The figure of the pontoon with the vertical
plank of wood and the figure on top of the cart holding a plank also.
 I was concerned that these figures would be too tall to fit into a really useful 10 litre box.
When these engineers are on the move, there will be three train wagons (equipment, pontoon, planks of wood)
 and when in situ the two dioramas will appear. That's the idea anyway.


Rope now added. Described as rigging rope on Ebay. 


Add caption