The positions were fixed and there were 3 objectives: the farm (3 buildings) , the village (seven buildings) and the bridge. 2 points for each objective. In the case of the buildings, the side that held the majority would get the points. Each hill (8 in total) was also worth 1 point and for every brigade destroyed, 1 point deducted. This latter inclusion was felt necessary as a draw seemed a distinct possibility before the game started. How wrong we were. The only variation in the scenario was that each side would have a flank attack coming on move 3 and with the 1D8 this would designate the point of entry. (8 being a deep flank attack)
OOB. 3 Inf Divs per side plus 7 cavalry brigades (independent) Each brigade of infantry and cavalry would have a brigade commander (BC), so a total of 13 each. Each BC would be given a rating ranging from +2 to -1. 2 BC's would be +2, 2 BC's would be +1, 2 BC's would be -1 and the remainder would be 0. Each brigade had a predetermined rating. (also from +2 to -1) Since the French had no Guard infantry or cavalry their solitary brigade with a +2 rating were the 2 regiments of Cuirassiers. The Prussians, however, had both their Guard infantry and Guard du Corps cavalry. The French would be relying on their Poles (+1) and had marginally better cavalry. The Prussians meanwhile had landwehr battalions (-1) scattered amongst each infantry brigade while the French had a Westphalian brigade, also at -1.
The French had stolen a march on the Prussians by taking the village (majority of) before the game had even begun. The Prussians were not aware of what faced them in the village though the blue and white flags might have given them a clue. Facing the Westphalians were the Prussian Guard's brigade and some heavy 12lb batteries. The French did not have any 12lbs as I still have not finished the caissons!!
Please refer to the map for the starting points:
PRUSSIANS: (line infantry were either Silesian, east or west Prussian or Pomerarnian)
C4 1 regt Sil Hussars + regt Drag + HA (routed)
B6 4 bbs line + 2 bns landwehr
B5 3 bns line + 2 bns landwehr + 1 bn of jaegers + FT (6 lb)
C5 1 regt Sil landwehr + 1 regt Uhlans
C1 2 regts of Guard du Corps + HA (Guard) (in fall back, badly mauled)
B4 4 bns line + 1 bn landwehr + 1 bn jaegers + FT (6lb)
B1 6 bns Guard + 2 FT batt (both 12lbs)
C2 2 regts Cuirassiers.
C3 1 regt Hussars + 1 regt Drag
B2 4 bns line + 2 landwehr + 1 reserve + 1 jaeger + FT (6lb)
B3 3 bns line + 3 bns reserve + 1 landwehr + 1 jaeger
C6 1 regt Hussars + 1 regt national cav + HA
C7 (flank attack) 1 regt of Uhlans, 1 regt of landwehr cav
 |
| Map 1. Starting positions. Flank attacks on map 2. |
FRENCH
C6 2 regts Drag + HA
B6 6 bns Polish line + FT (6lb)
B8 6 bns Polish line
C7 2 regts Hussars (routed)
C9 2 regts Drag
B7 5 bns French line + 1 light bn + FT (6 lb) (fall back)
B12 6 bns Westphalian line + FT (6 lb)
C3 2 regts Cuirassiers + HA (routed)
C8 1 regt Hussars + 1 regt line lancers (routed)
B5 3 bns French line + 2 bns Swiss + 1 light bn + FT (6 lb) (routed)
B4 5 bns French line + 1 light bn + FT (6 lb) (routed)
C5 2 regts Drag + HA (routed)
C4 (flank attack) 1 regt lancers + 1 regt hussars. (routed)
 |
| C6. Prussian cavalry on their right flank. This brigade was all but destroyed, especially when the French flank attack appeared directly at their location. |
 |
| B3 in the foreground with B2 in the distance. Larger brigades |
 |
| C3 and C2 |
 |
| Part of the Prussian Guard's brigade opposite the village. Two 12lbs, one already deployed. |
 |
| B4. This brigade would help the Prussian Guard in their assault on the village. |
 |
| C1 and C5, with B5 in the distance. |
 |
| C4 and B6. Prussian left flank. The two brigades of this Division were divided by the stream.(fordable) I think it was this Brigade that saw at least 3 different commanders. |
 |
| B4 and C5. French right flank. |
 |
| B5 This brigade shows that different makes can blend and why not plastic??!! Swiss (French airfix) French line: Scruby? Newline design and Zvevda French light infantry (plastic) |
 |
| C3 and C8. The destruction of these units partially led to the collapse of the French right and centre right. |
 |
| B12. Westphalians in the village. |
 |
| B7. Supporting the Westphalians. This brigade took some of the pressure off the Westphalians by at a cost. |
 |
| C9. French Dragoons. |
 |
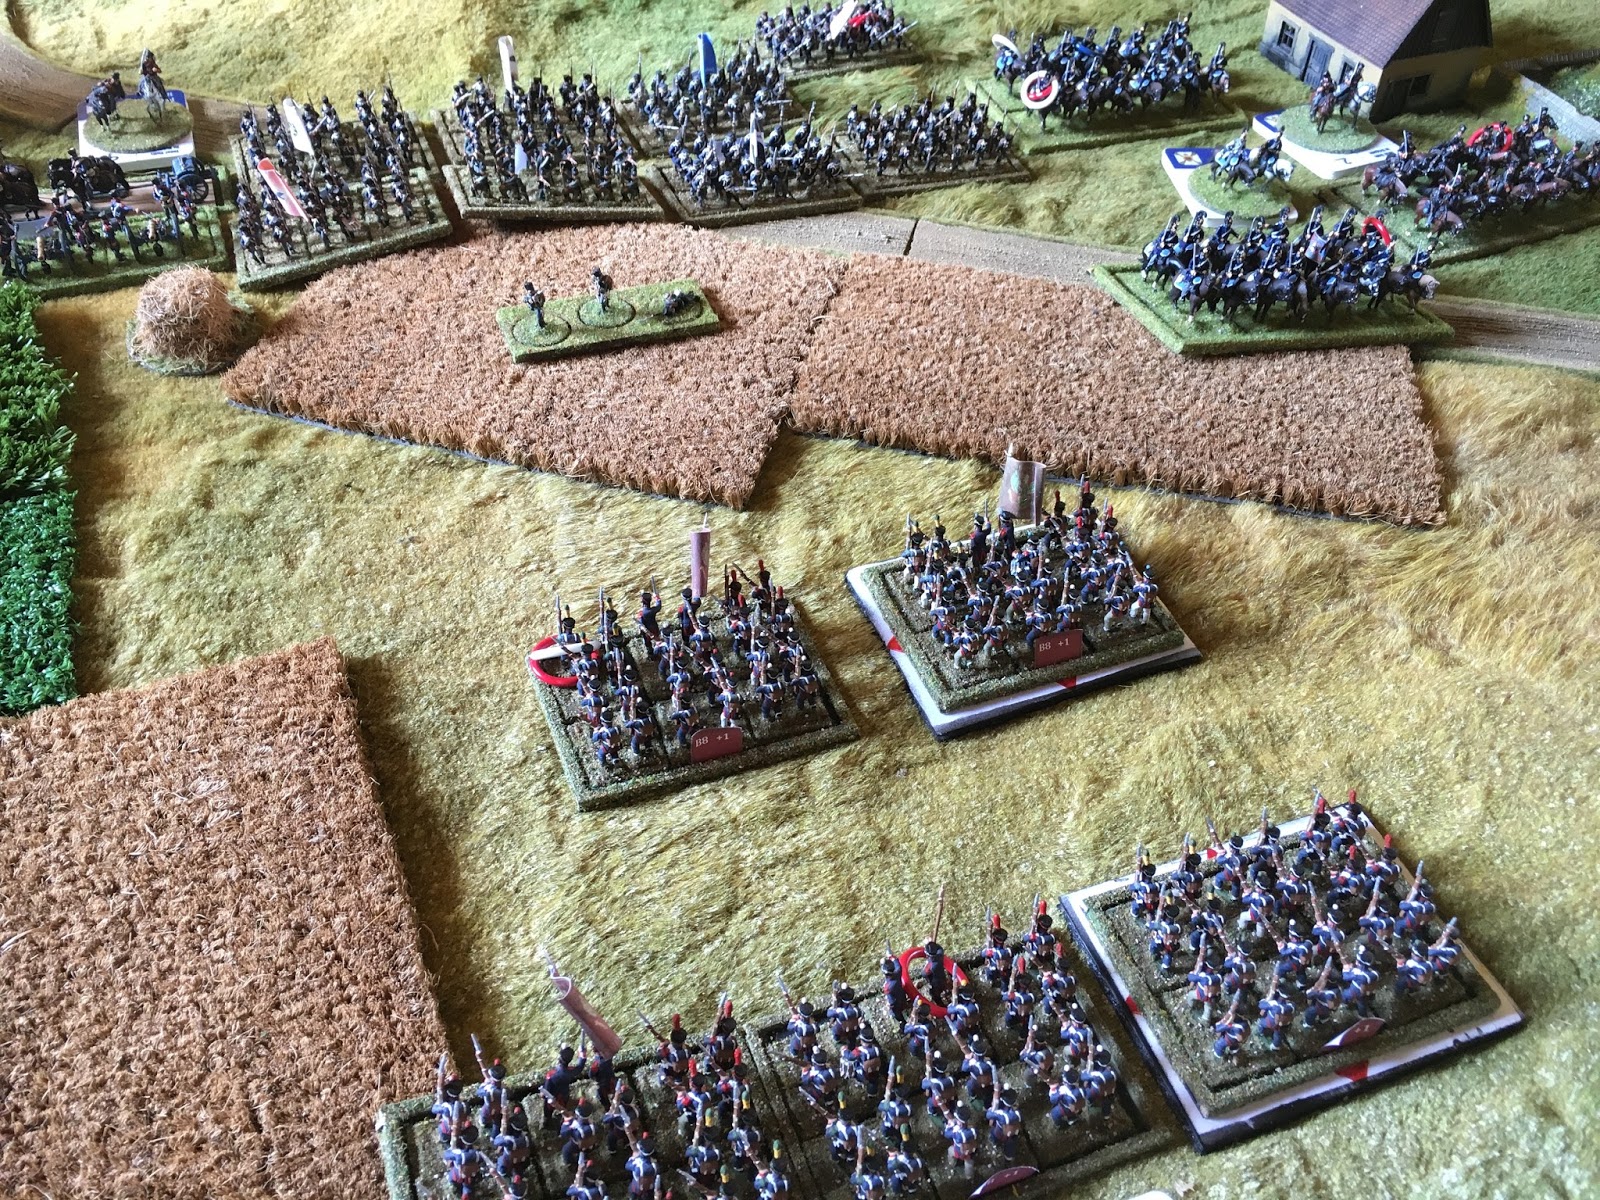
| C7. This cavalry brigade was eventually destroyed. B8 The Polish brigade |
 |
| B6. Polish brigade and C6 French Dragoons. French left flank would have to beware of the Prussian flank attack |
The Prussians won the initiative and elected to go first. The big advantage in this instance was that units beyond 80cm of the enemy could move twice. This allowed the Prussians to get close to the barn in the farm complex and for their Guard to close in on the village and deploy their artillery.


 |
| B5. This brigade was ordered to cross the stream and aid their colleagues on the flank. This move proved crucial in winning this flank and ultimately securing the bridge. The light battalion approached the bridge via the wood. |
 |
| C4 and B6. Prussian infantry and cavalry attempt to secure the ridge line. |

 |
| B5. French infantry and those Swiss head towards the bridge. |
 |
| C3 and C8. French cavalry to the right of the village. |

 |
| B7. French infantry move up to help the Westphalians in the village. |


 |
| B6 and C6 move up to secure the hill overlooking the farm. |
 |
| C7 Prussian flank attack arrives at entry point 2, so too shallow and had to catch up their colleagues (C6) |


 |
| Prussian Guard close in on the village. Their artillery got one round of effective fire in, causing casualties, before their own infantry made further firing impossible. |
 |
| B4. Having taken this building in the village, the Prussian jaegers were caught out by French Cuirassiers and destroyed. However, the cuirassiers could not unentangle themselves from the successful melee, and in turn would be annihilated. |
 |
| Prussian B5 coming the aid of B6 which was on the verge of routing. |

 |
| The Swiss are nearly at the bridge, while French infantry start to scale the ridge |
 |
| Swiss battalion about the secure the bridge. The Prussian light battalion, in the wood, meets its counterpart. |
 |
| French Cuirassiers rout the Prussian jaegers but were soon counter attacked shortly afterwards. |
 |
| B4. prussian infantry start to (slowly) gobble up the village |
 |
| B8. This Polish brigade stopped in the face of the Prussian B2 with artillery. |
 |
| Prussian cavalry make their numbers count on their right wing. (C7 and C6) |
 |
| B6. The Polish made two attempts to capture the barn and failed both times. Disorder mounted up on both units making any subsequent attempt all the harder. |
 |
| B8. Once this brigade did move forward, the two right hand battalions became pinned down by Prussian cavalry, notably the East Prussian Cuirassiers. (C2) |
 |
| French begin to withdraw from the village |

 |
| By the end, a few prussian units held the ridge and the bridge., but both French brigades fell apart with only 2 out 6 battalions leaving the field in order. |
 |
| C1. The Prussian Guard du Corps effectively ceased to exist by the end but they had done their job. |
 |
| Prussian artillery left in the rear. |
 |
| The Allies never got another chance to take the initiative. They would have loved the opportunity to have two consecutive moves at approx move 3 or 4, but never got the chance. When they did, move 6, it was too late. Game over by move 7 (is that a record?) |
 |
| This illustrates what a hard fought game it was. The Prussians took severe casualties but only lost 1 cavalry brigade. |
 |
| Map 2. Shows the flank attacks and movement of units. A x with a unit indicates which were routed. |
Excellent fun and the rules stood up well. The brigade test, taken before each move, for every brigade, does take time, but is crucial to the command and control mechanics of the game.
The French right hand brigades eventually ran out of steam, despite having a superior cavalry presence by the end. This was not enough to secure the ridge or the bridge, which ultimately became untenable when Prussian cavalry arrived late in the day. So the Airfix Swiss, who marched joyfully across the bridge earlier, found themselves leaving the field in a hurry shortly afterwards.
The Westphalians in the centre did as well as could be expected, but successive throws of 1 or 2 in this game will always make life difficult. The Poles tried but ultimately failed to take the barn in the middle of the farm complex. So each of their +1 battalions never saw their potential fully realised.
Credit should be given to the Prussian commanders. The Prussian right used their cavalry to put pressure on the Poles without committing their inferior infantry. The Prussian Guard made their +2 rating count in the village, but even they were badly mauled by the end. The Prussian left took the decision to cross the stream and reconsolidate their divided B6 and B5 brigades. This action saved that flank.
All over in 5 hours of playing time. Thanks to all those that attended.
PS I will eventually get time to paint the newly arrived Art Miniaturen French cavalry line chasseurs as the 3rd, 5th, 16th and 22nd regiments, and have them ready for 2018.
No comments:
Post a Comment