The French were permitted to shift their positions from the deployment given to them initially by the umpire, while the Allied commanders sipped their coffee out of sight.
 |
| Battle map with Plauen in the west, Bachnitz in the centre and Strehlen in the east. The three objectives. |
Plauen (forgive the spelling of the three villages!) with the church in the foreground was to be held by a conscript French brigade with a brigade of Poles in support. The French decided to give this French brigade commander an above average morale rating which was to prove crucial in the battle for this objective. A battery of artillery was positioned on the hill to the west of the river line. Impossible to get at for the Allies, and meant that any attack on Plauen would be vulnerable from flank fire from the hill. A brigade of light cavalry were also in support.
 |
| An overview looking from the west. |
Unbeknown to the Allies a French engineer company was busy building a pontoon bridge in square A5, behind a hill and screened by trees protected by a single battalion of infantry (pictured). If the french are re-enforced on this flank tomorrow they will welcome this access point. But would the Allies detect it?
The French centre consisted of a Saxon brigade (poor) which was given the task of defending Bachnitz, again with a Polish brigade in support.
 |
| The Saxon Brigade commander did as well as could be expected. |
On the western flank of Bachnitz there were fairly large quantities of French medium and light cavalry with a large heavy brigade of French Cuirassiers on the eastern flank.
 |
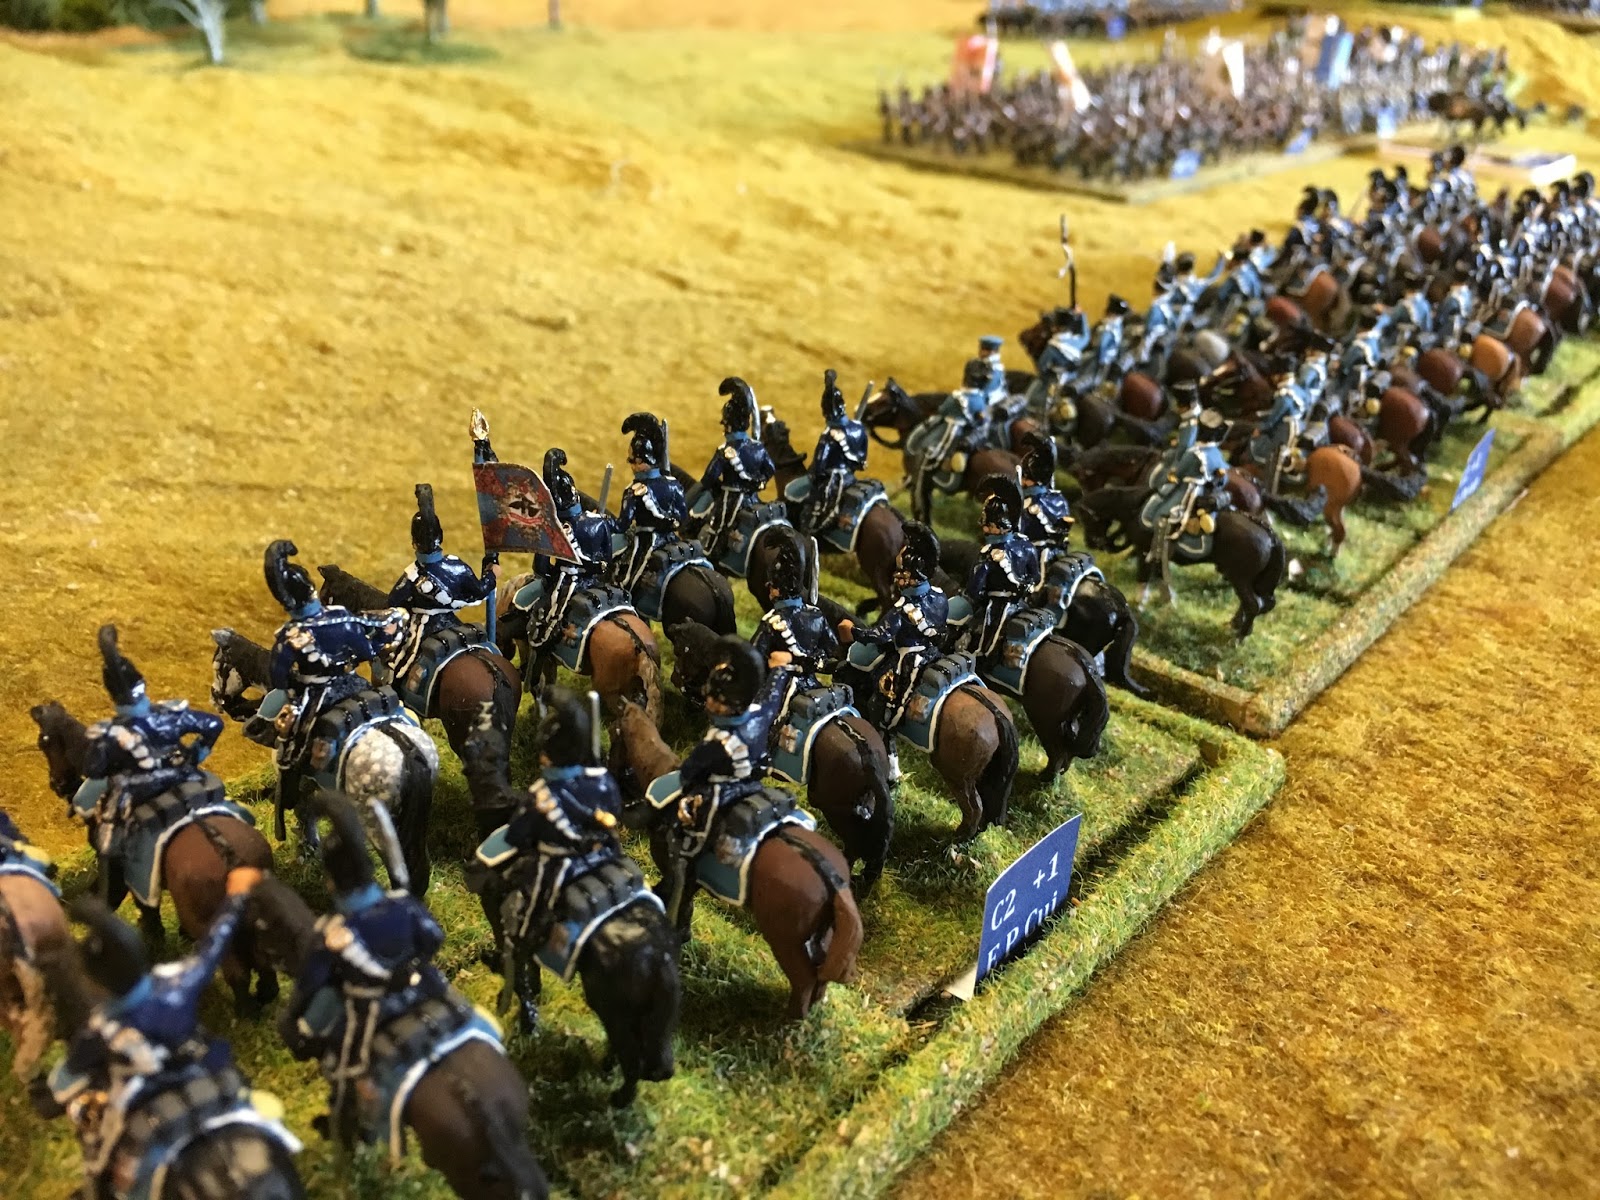
| The 3rd French heavy cavalry brigade. |
 |
| The 6th and 8th French light cavalry brigades. |
The eastern flank and the defence of Strehlen was delegated to the Bavarians, with one brigade strung out between the wood and the road east of Bachnitz while the other brigade was held back in Stehlen with two light battalions in the woods to the north of Strehlen. A brigade of French dragoons were positioned on the extreme flank.
 |
| The Bavarian 10th Brigade with supporting artillery on the hill, prepare to take on the more numerous Austrians. |
 |
| The Bavarian commander of the 11th Brigade who managed to hold Stehlen. |
The Allied deployment.
 |
| Prussian deployment in the west. |
 |
| The Prussian 2nd cavalry brigade. |
 |
| The 4th Prussian Cavalry brigade. |
 |
| The Prussian 5th brigade prepare to attack in the centre with the Prussian Guard out of shot to their right. |
 |
| The pride of the Prussian cavalry. |
 |
| The Austrian 2nd Infantry brigade prepares to lead the attack on Stehlen. |
 |
| The 1st Hungarian Grenadiers. |
 |
| Two Austrian cavalry briagdes, one heavy (2nd) and one a mixture of Dragoons and Cheveuxleger (3rd) |
 |
| The supporting Hungarian 6th brigade, making up the third contingent of this large Austrian infantry division. |
The onus was on the Allies to make quick progress within the 10 moves allowed for on Day 1. On the western flank, Prussian progress was initially good. The French battery on the hill squandered opportunities to inflict serious casualties with a series of unfortunate dice throws. Quickly the most forward building fell to the Prussian 6th brigade, the French conscripts inside, rapidly put to flight. The Poles moved up smartly to prevent a catastrophe and the French position held.
 |
| Prussian infantry move forward to attack Plauen. |
 |
| The 3rd Prussian cavalry brigade moved slowly forwards to link up with the 4th cavalry brigade. |
A cavalry clash to the west of Bachnitz resulted in the French 8th cavalry brigade being annihilated while the Prussian Guard de Corps were also destroyed, largely by French battery fire.
The Prussian attack on Bachnitz initially went well for the Prussians. The Prussian Guard and 5th Brigades routed the Saxon brigade, though the Saxons did cause some initial set backs for the Prussians. Again the Poles moved in to restore order and the damage to the Prussian Guard was irreversible and resulted in the Prussians total destruction of their prime unit. Two buildings were taken but the Poles managed to re-take the barn.
 |
| The barn on the right was taken by the Prussian Guard and then re-taken by the Poles. |
The Austrian assault moved into the bottleneck between the stream (crossable) and the hill/wood but without close cavalry support were quickly halted by the French 9th Dragoon brigade, which moved up to support the Bavarians. Weight of numbers would eventually see the Austrians make progress but if there had been a moment to cause a problem for the Austrians, this was it and was seized upon by the Bavarian commander, who used the mix of infantry and cavalry in close support to excellent effect.
 |
| The Austrian bottleneck. Just not enough room to deploy properly. |
Meanwhile the Austrian 6th brigade moved across the stream and some Austrian heavy cavalry also crossed the bridge onto the hill. The 4th Austrian cavalry brigade played cat and mouse with the French cavalry on the eastern flank.
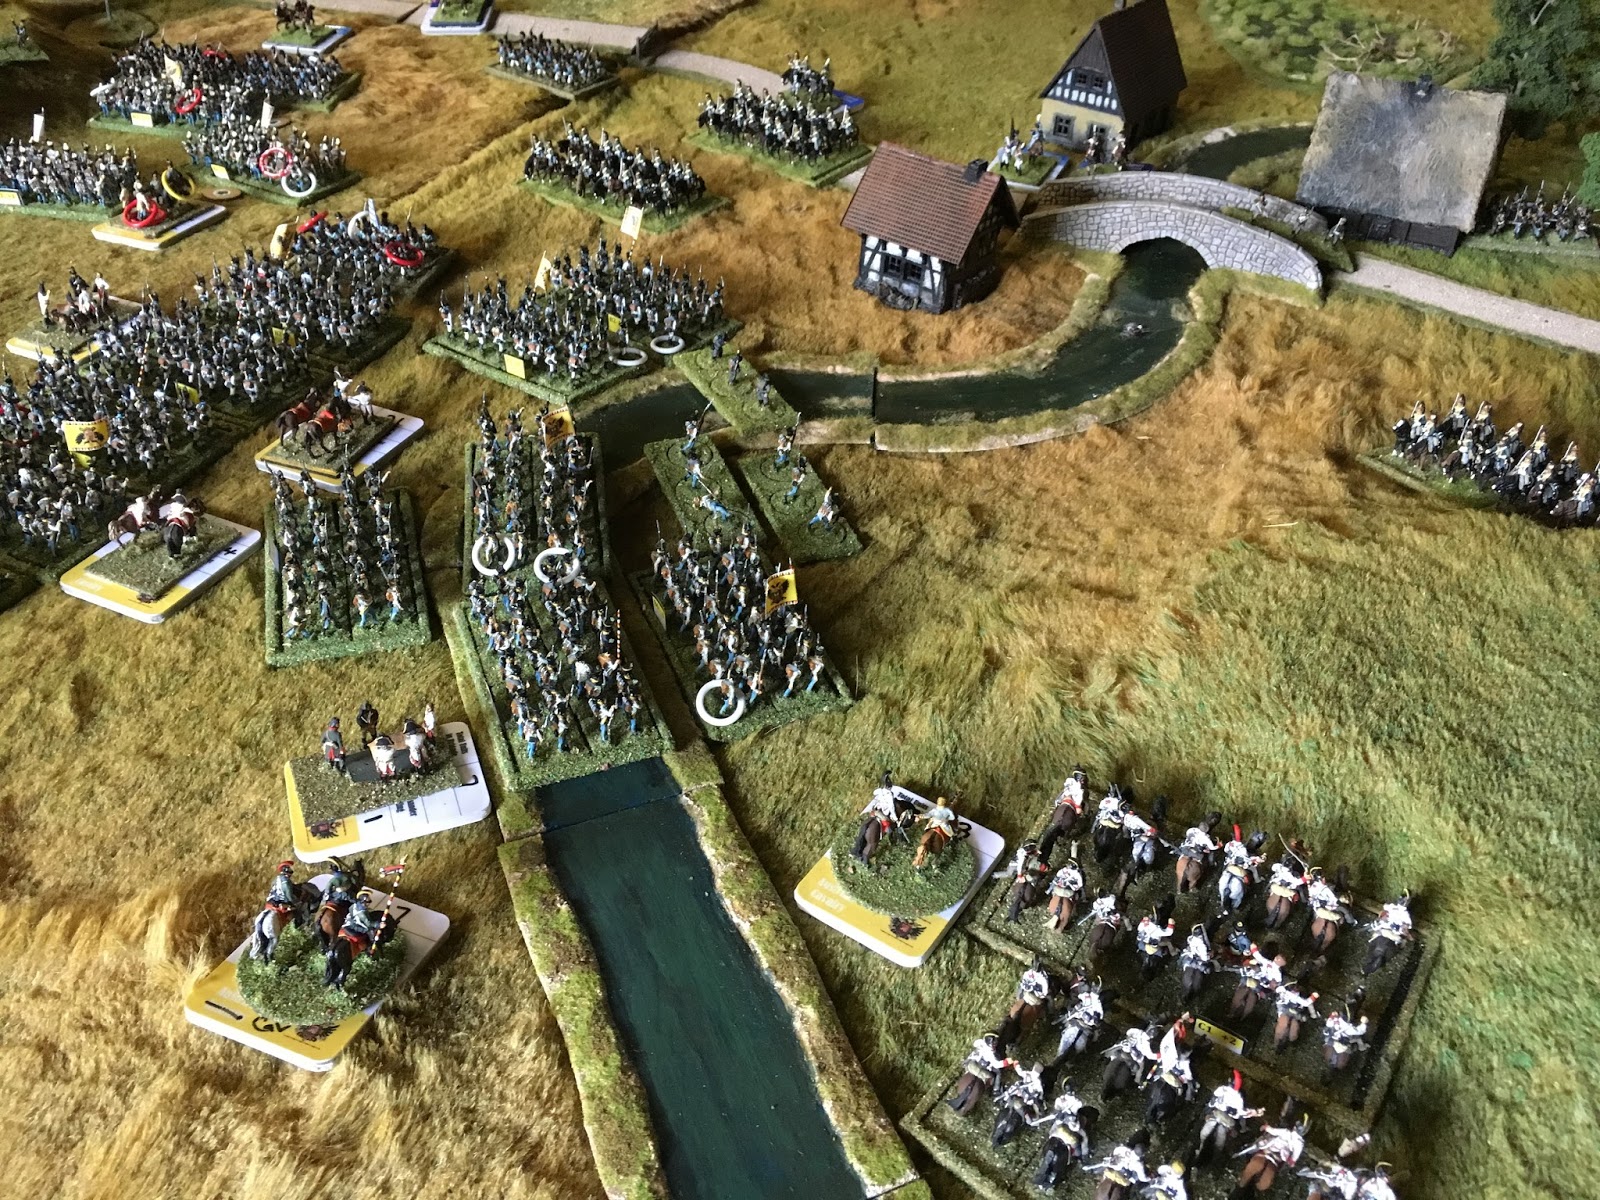 |
| The Austrian 6th brigade moves across the stream. |
Nightfall on Day 1.
Around Plauen….the French attempted twice to take back the forward building taken by the Prussian 6th brigade and failed both times. The Prussian 6th brigade commander was awarded the iron cross and his morale rating increased from 0 to +1. Crucially this was the building where the 5 mystery reserve artillery rounds were stored. These would fall into Allied hands. The French battery on the hill, despite running out of effective artillery rounds, was able to cause significant damage, causing the Prussian 2nd brigade to retreat.
 |
| Flank fire from the hill. |
 |
| The French 7th cavalry brigade remained untouched all day, while Poles are forced into square from Prussian cavalry. |
 |
| The Prussian view of Plauen. |
The Allies never did see what was going on behind those trees and hill so by morning, a new bridge will have been constructed but will it be needed?
 |
| French engineers finishing off that bridge. |
 |
| Massed Prussian cavalry between Bachnitz and Plauen. |
The Polish efforts in the centre stabilised control and so two-thirds of Bachnitz remained in French hands, and again, importantly this included the barn which had housed the artillery arsenal. The Polish 6th brigade commander's rating was already +2 and he was given the legion d'honneur and permitted to sleep with the Corps commander's mistress. Those French!
 |
| The Austrians finally make progress but fail to take Strehlen. |
It will remain to be seen if French reinforcements will arrive quickly enough to help the promising start made by the French commanders on day 1. Where they appear will also be crucial.
The Allies have re-deployed their 2nd Prussian cavalry brigade to the centre and Austrian units should now at last make headway with so little French cavalry left to hinder them.
The Allies have 5 effective artillery rounds to re-distribute and the French 10. The French commander of Plauen has a foot battery and a horse battery, both of which have run dry. How he would dearly wish for that re-supply to come his way.
Awesome Francis, great read with lovely troops and terrain!!!
ReplyDeletelovely Francis, what rules are you using Francis
ReplyDeleteThanks Paul. Your figures are considerably better painted. In house rule set which is constantly being updated but seemed to stand up pretty well. Would be happy to share my rules with anyone who wants them but I have no idea how to upload to the blog as a downloadable word doc. Any ideas?
ReplyDelete